13. RenderToTexture (+06.08.04)
Posted 2007/09/15 19:28 by 수달--------------------------------------------------------------------------
튜토리얼 : 13. 텍스처에 그리기
----------------------------
이번 예제는 IRRLICHT에서 한 텍스처에 어떤 그림을 어떻게 그리는지 보여줄 것이다. 텍스처에 무언가를 그리는 것은 꽤 멋진 효과를 만들어 낸다. 또한 이 예제는 반사광(specular)을 어떻게 나타내야 할지 보여준다.
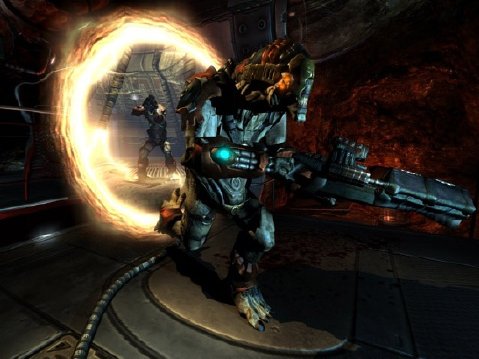
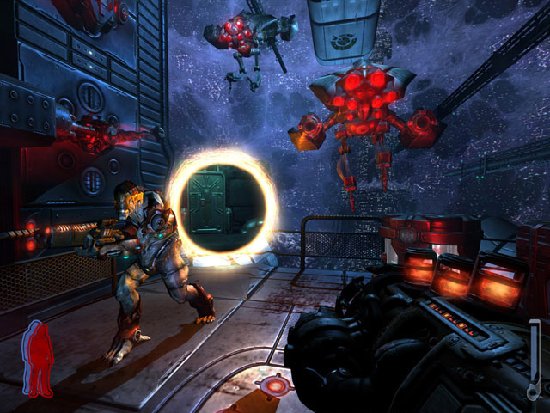
+ 여기서 텍스처에 무언가를 그린 다는 개념은, FPS 게임 프레이의 이공간을 이동할 때 사용되는 포탈 모습과 비슷하다. 즉, 어떤 대상 텍스처에 또하나의 카메라에 보이는 모습을 그린다는 뜻이다. 아래 코드를 보면, 사용자가 쓰는 FPS 카메라와 고정 카메라가 나온다. 고정 카메라에 비추는 모습을 대상 텍스처에 그리게 된다. 아래 그림은 프레이의 한 장면들로, 좌측 붉게 타오르는 둥근 원이 포탈인데, 주요 화면과 포탈 속 화면의 보여지는게 다름을 알 수 있다.
--------------------------------------------------------------------------
시작
----
시작부는 다른 예제와 같다. 헤더 파일을 넣고, 렌더링 방식을 물은 다음, IRRLICHT 엔진을 만들자.
#include <irrlicht.h>
#include <iostream>
using namespace irr;
#pragma comment(lib, "Irrlicht.lib")
int main()
{
// let user select driver type
video::E_DRIVER_TYPE driverType = video::EDT_DIRECT3D9;
printf("Please select the driver you want for this example:\n"\
" (a) Direct3D 9.0c\n (b) Direct3D 8.1\n (c) OpenGL 1.5\n"\
" (d) Software Renderer\n (e) Apfelbaum Software Renderer\n"\
" (f) NullDevice\n (otherKey) exit\n\n");
char i;
std::cin >> i;
switch(i)
{
case 'a': driverType = video::EDT_DIRECT3D9;break;
case 'b': driverType = video::EDT_DIRECT3D8;break;
case 'c': driverType = video::EDT_OPENGL; break;
case 'd': driverType = video::EDT_SOFTWARE; break;
case 'e': driverType = video::EDT_SOFTWARE2;break;
case 'f': driverType = video::EDT_NULL; break;
default: return 1;
}
// create device and exit if creation failed
IrrlichtDevice *device =
createDevice(driverType, core::dimension2d<s32>(640, 480),
16, false, false);
if (device == 0)
return 1; // could not create selected driver.
video::IVideoDriver* driver = device->getVideoDriver();
scene::ISceneManager* smgr = device->getSceneManager();
gui::IGUIEnvironment* env = device->getGUIEnvironment();
화면에 보여질 애니메이션하는 메시를 읽자. 다른 예제에서 많이 쓰인 MD2 모델 페어리를 사용하기로 한다. 다른 예제와의 차이점은 모델의 밝기(광택?) 값이 기본 값 0이 아니라는 것이다. 밝기가 0이 아니고 동적 광원이 있는 경우, 모델에 대한 반사광이 가능하다. 그리고 그 값은 하이라이트의 크기에도 영향을 준다.
// load and display animated fairy mesh
scene::IAnimatedMeshSceneNode* fairy = smgr->addAnimatedMeshSceneNode(
smgr->getMesh("../../media/faerie.md2"));
if (fairy)
{
fairy->setMaterialTexture(0, driver->getTexture("../../media/faerie2.bmp")); // set diffuse texture
fairy->setMaterialFlag(video::EMF_LIGHTING, true); // enable dynamic lighting
fairy->getMaterial(0).Shininess = 20.0f; // set size of specular highlights
fairy->setPosition(core::vector3df(-10,0,-100));
}
모델에 반사광을 반들기 위해 씬 안에 동적 광원이 필요하다. 모델 근처에 광원을 바로 놓자. 그리고 모델을 지나치게 어둡지 않게 회색의 주변광(ambient)을 설정하자.
// add white light
scene::ILightSceneNode* light = smgr->addLightSceneNode(0,
core::vector3df(-15,5,-105), video::SColorf(1.0f, 1.0f, 1.0f));
// set ambient light
driver->setAmbientLight(video::SColor(0,60,60,60));
다음 것들은 일반적인 내용들이다. 씬에 사용자가 다루는 카메라를 넣고, 마우스 커서를 끄며, 테스트용 정육면체를 만들어 회전시켜 보겠다.
// add fps camera
scene::ICameraSceneNode* fpsCamera = smgr->addCameraSceneNodeFPS();
fpsCamera->setPosition(core::vector3df(-50,50,-150));
// disable mouse cursor
device->getCursorControl()->setVisible(false);
// create test cube
scene::ISceneNode* test = smgr->addTestSceneNode(60);
// let the cube rotate and set some light settings
scene::ISceneNodeAnimator* anim = smgr->createRotationAnimator(
core::vector3df(0.3f, 0.3f,0));
test->setPosition(core::vector3df(-100,0,-100));
test->setMaterialFlag(video::EMF_LIGHTING, false); // enable dynamic lighting
test->addAnimator(anim);
anim->drop();
// set window caption
device->setWindowCaption(L"Irrlicht Engine - Render to Texture and Specular Highlights example");
텍스처에 그리기를 해보기 위해선, 대상 텍스처가 필요하다. 일반적인 텍스처와는 다르지만 어쨌건 일단 생성은 되야 한다. IVideoDriver::createRenderTargetTexture()를 호출하고 텍스처 크기를 맞추자. 대상 텍스처는 프레임 버퍼와 Z버퍼를 공유하기 때문에, 프레임 버퍼보다 큰 사이즈면 안 된다. 예제가 표현하려는 것을 모두 보여주기 위해, 장면에 고정된 카메라를 더할 것이다. (역자 주 : 파란 테스트 정육면체의 페어리는 항상 같은 방향에서만 보인다. 고정 카메라는 이것을 의미하며, 전체 씬은 여전히 방향키와 마우스로 자유롭게 볼 수 있다.) 이 모든 것 이전에 과연 현재 장치가 텍스처 그리기를 지원하는지 살펴야 한다. 만약 못할 경우 경고 문구를 보낼 것이다.
// create render target
video::ITexture* rt = 0;
scene::ICameraSceneNode* fixedCam = 0;
if (driver->queryFeature(video::EVDF_RENDER_TO_TARGET))
{
rt = driver->createRenderTargetTexture(core::dimension2d<s32>(256,256));
test->setMaterialTexture(0, rt); // set material of cube to render target
// add fixed camera
fixedCam = smgr->addCameraSceneNode(0, core::vector3df(10,10,-80),
core::vector3df(-10,10,-100));
}
else
{
// create problem text
gui::IGUISkin* skin = env->getSkin();
gui::IGUIFont* font = env->getFont("../../media/fonthaettenschweiler.bmp");
if (font)
skin->setFont(font);
gui::IGUIStaticText* text = env->addStaticText(
L"Your hardware or this renderer is not able to use the "\
L"render to texture feature. RTT Disabled.",
core::rect<s32>(150,20,470,60));
text->setOverrideColor(video::SColor(100,255,255,255));
}
거의 끝나간다. 매 프레임마다 장면을 두번씩 그린다. 한번은 대상 텍스처에 고정 카메라로, 한번은 일반적으로 말이다. 대상 텍스처에 그리기가 실행될 때는 테스트 육면체를 안보이게 해야한다. 그래야 대상 텍스처 그리기가 적용된다.
while(device->run())
if (device->isWindowActive())
{
driver->beginScene(true, true, 0);
if (rt)
{
// draw scene into render target
// set render target texture
driver->setRenderTarget(rt, true, true, video::SColor(0,0,0,255));
// make cube invisible and set fixed camera as active camera
test->setVisible(false);
smgr->setActiveCamera(fixedCam);
// draw whole scene into render buffer
smgr->drawAll();
// set back old render target
driver->setRenderTarget(0);
// make the cube visible and set the user controlled camera as active one
test->setVisible(true);
smgr->setActiveCamera(fpsCamera);
}
// draw scene normally
smgr->drawAll();
env->drawAll();
driver->endScene();
}
if (rt)
rt->drop(); // drop render target because we created if with a create() method
device->drop(); // drop device
return 0;
}
---------------------------------------------------------------------------
텍스처에 임의의 그림을 그리는 기술을 소개했다.
+ 서로 다른 카메라에 비추는 3D 공간을 표현하는 매우 대단한 기술이다.
'기본 카테고리' 카테고리의 다른 글
| Irricht엔진튜토리얼 15. LoadIrrFile (0) | 2009.03.19 |
|---|---|
| Irricht엔진튜토리얼 14. Win32Window (0) | 2009.03.19 |
| Irricht엔진튜토리얼 12. TerrainRendering (0) | 2009.03.19 |
| Irricht엔진튜토리얼 11. PerPixelLighting (0) | 2009.03.19 |
| Irricht엔진튜토리얼 10. Shaders (0) | 2009.03.19 |