-------------------------------------------------------------------------
튜토리얼 9 : 메시 뷰어
--------------------
이번 예제는 엔진을 이용해 좀 더 복잡한 어플래케이션을 만드는 법을 보인다. 여기서는 간단한 메시 뷰어(역자 주 : 캐릭터나 사물등 그래픽 디자이너가 만든 3D 모델을 불러서 화면에 보이는 툴. 이 툴을 이용해 전용 포맷을 뽑아내기도 한다. 최악의 경우 바이너리로 WriteFile() 할 수도 있다.)를 만들 것이다. 메시 뷰어는 엔진의 UI API와 씬 메니저를 사용해 만든다. (역자 주 : API는 Application Programing Interface의 약자로 개발자들이 어플리케이션 프로그래밍을 하는데 제공되는 함수나 라이브러리등을 의미한다.)
예제는 버튼, 윈도, 툴바, 메뉴, 콤보박스, 탭컨트롤, 에딧박스, 이미지, 메시지 박스, 스카이 박스를 사용하며, 또한 엔진의 XML 리더기(reader)로 XML 파싱하는 법을 보일 것이다. (역자 주 : XML 파싱이란, 그래픽 툴이 제공하는 포맷 양식이 아닌 XML 양식으로 추출(export)된 3D 관련 파일을 메시 뷰를 통해 읽어 재해석함을 의미한다. 다른 예로 ASE 추출/파싱, X파일 추출/파싱 등이 있을 것이다.)
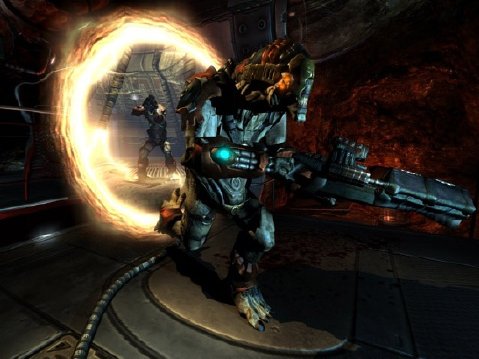
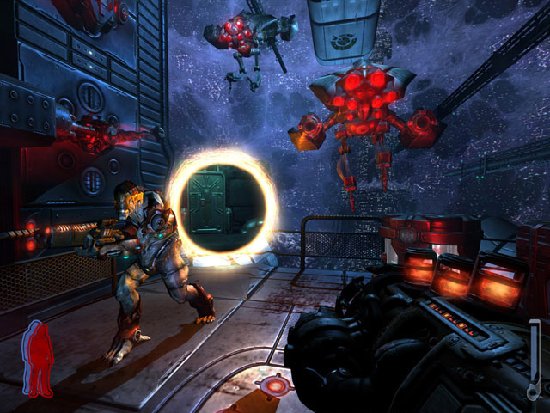
아래 모습의 프로그램이 만들어 질 것이다.

-------------------------------------------------------------------------
시작
----
시작은 이전 예제와 거의 같다. 필요한 헤더, 라이브러리를 읽고, 각종 전역 변수를 선언한다. 다만 여기서는 필요한 두 개의 'using namespace'만 사용한다. (불필요하게 전체 클래스의 name을 부를 필요는 없다.)
#include <irrlicht.h>
#include <iostream>
using namespace irr;
using namespace gui;
#pragma comment(lib, "Irrlicht.lib")
IrrlichtDevice *Device = 0;
core::stringc StartUpModelFile;
core::stringw MessageText;
core::stringw Caption;
scene::IAnimatedMeshSceneNode* Model = 0;
scene::ISceneNode* SkyBox = 0;
다음 세개의 함수는 메시 뷰어에서 잡다한 일을 처리하는 함수다. 첫번째 함수인 showAboutText()는 메세지 글과 메세지 박스 캡션을 쉽게 다루게 한다. 메세지 글은 stringw 변수인 MessageText에 저장될 것이고 캡션 역시 Caption 변수에 저장 될 것이다.
void showAboutText()
{
// create modal message box with the text
// loaded from the xml file.
Device->getGUIEnvironment()->addMessageBox(
Caption.c_str(), MessageText.c_str());
}
두번째 함수인 loadModel()은 addAnimatedMeshSceneNode와 씬 메니저를 이용해, 모델을 읽고 화면에 표시하게 해 줄 것이다. 어려운 것은 없다. 또한 이 함수는 모델 읽기 실패 시 짧은 메세지 박스를 보일 것이다.
void loadModel(const c8* fn)
{
// modify the name if it a .pk3 file
c8 filename[1024];
strcpy(filename, fn);
c8* found = 0;
if (found = strstr(filename, ".pk3"))
{
Device->getFileSystem()->addZipFileArchive(filename);
strcpy(found +1, "bsp");
}
// load a model into the engine
if (Model)
Model->remove();
Model = 0;
scene::IAnimatedMesh* m =
Device->getSceneManager()->getMesh(filename);
if (!m)
{
// model could not be loaded
if (StartUpModelFile != filename)
Device->getGUIEnvironment()->addMessageBox(
Caption.c_str(), L"The model could not be loaded. " \
L"Maybe it is not a supported file format.");
return;
}
// set default material properties
Model = Device->getSceneManager()->addAnimatedMeshSceneNode(m);
if (!found)
Model->setMaterialType(video::EMT_TRANSPARENT_ADD_COLOR);
Model->setMaterialFlag(video::EMF_LIGHTING, false);
Model->setDebugDataVisible(true);
Model->setAnimationSpeed(1000);
}
세번째 함수는 툴박스 윈도를 만든다. 이번 예제의 간단한 메시 뷰어는 복잡한 기능을 넣지 않는다. 다만 화면에 출력되는 모델의 크기를 변화시키기 위한 세개의 에딧박스를 가진 탭 컨트롤만 있으면 된다.
void createToolBox()
{
// remove tool box if already there
IGUIEnvironment* env = Device->getGUIEnvironment();
IGUIElement* root = env->getRootGUIElement();
IGUIElement* e = root->getElementFromId(5000, true);
if (e) e->remove();
// create the toolbox window
IGUIWindow* wnd = env->addWindow(core::rect<s32>(450,25,640,480),
false, L"Toolset", 0, 5000);
// create tab control and tabs
IGUITabControl* tab = env->addTabControl(
core::rect<s32>(2,20,640-452,480-7), wnd, true, true);
IGUITab* t1 = tab->addTab(L"Scale");
IGUITab* t2 = tab->addTab(L"Empty Tab");
// add some edit boxes and a button to tab one
env->addEditBox(L"1.0", core::rect<s32>(40,50,130,70), true, t1, 901);
env->addEditBox(L"1.0", core::rect<s32>(40,80,130,100), true, t1, 902);
env->addEditBox(L"1.0", core::rect<s32>(40,110,130,130), true, t1, 903);
env->addButton(core::rect<s32>(10,150,100,190), t1, 1101, L"set");
// add senseless checkbox
env->addCheckBox(true, core::rect<s32>(10,220,200,240), t1, -1,
L"Senseless Checkbox");
// add und0cumentated transparent control
env->addStaticText(L"Transparent Control:", core::rect<s32>(10,240,150,260),
true, false, t1);
IGUIScrollBar* scrollbar =
env->addScrollBar(true, core::rect<s32>(10,260,150,275), t1, 104);
scrollbar->setMax(255);
// bring irrlicht engine logo to front, because it
// now may be below the newly created toolbox
root->bringToFront(root->getElementFromId(666, true));
}
GUI 개체들에서 보내오는 여러 이벤트들을 받기 이해 이벤트 리시버(event receiver)를 만들어야 한다. 만약 이벤트가 발생하면 리시버는 해당 ID를 확인하고 그에 맞는 행동을 시작한다. (역자 주 : ID는 이후 main()에서 각 GUI가 등록 되면서 결정된다.)
class MyEventReceiver : public IEventReceiver
{
public:
virtual bool OnEvent(SEvent event)
{
if (event.EventType == EET_GUI_EVENT)
{
s32 id = event.GUIEvent.Caller->getID();
IGUIEnvironment* env = Device->getGUIEnvironment();
switch(event.GUIEvent.EventType)
{
case EGET_MENU_ITEM_SELECTED:
{
// a menu item was clicked
IGUIContextMenu* menu =
(IGUIContextMenu*)event.GUIEvent.Caller;
s32 id = menu->getItemCommandId(menu->getSelectedItem());
switch(id)
{
case 100: // File -> Open Model
env->
addFileOpenDialog(L"Please select a model file to open");
break;
case 200: // File -> Quit
Device->closeDevice();
break;
case 300: // View -> Skybox
SkyBox->setVisible(!SkyBox->isVisible());
break;
case 400: // View -> Debug Information
if (Model)
Model->
setDebugDataVisible(!Model->isDebugDataVisible());
break;
case 500: // Help->About
showAboutText();
break;
case 610: // View -> Material -> Solid
if (Model)
Model->setMaterialType(video::EMT_SOLID);
break;
case 620: // View -> Material -> Transparent
if (Model)
Model->setMaterialType
(video::EMT_TRANSPARENT_ADD_COLOR);
break;
case 630: // View -> Material -> Reflection
if (Model)
Model->setMaterialType(video::EMT_SPHERE_MAP);
break;
}
break;
}
case EGET_FILE_SELECTED:
{
// load the model file, selected in the file open dialog
IGUIFileOpenDialog* dialog =
(IGUIFileOpenDialog*)event.GUIEvent.Caller;
loadModel(core::stringc(dialog->getFilename()).c_str());
}
case EGET_SCROLL_BAR_CHANGED:
// control skin transparency
if (id == 104)
{
s32 pos = ((IGUIScrollBar*)event.GUIEvent.Caller)->getPos();
for (s32 i=0; i<irr::gui::EGDC_COUNT ; ++i)
{
video::SColor col =
env->getSkin()->getColor((EGUI_DEFAULT_COLOR)i);
col.setAlpha(pos);
env->getSkin()->setColor((EGUI_DEFAULT_COLOR)i, col);
}
}
break;
case EGET_BUTTON_CLICKED:
switch(id)
{
case 1101:
{
// set scale
gui::IGUIElement* root = env->getRootGUIElement();
core::vector3df scale;
core::stringc s;
s = root->getElementFromId(901, true)->getText();
scale.X = (f32)atof(s.c_str());
s = root->getElementFromId(902, true)->getText();
scale.Y = (f32)atof(s.c_str());
s = root->getElementFromId(903, true)->getText();
scale.Z = (f32)atof(s.c_str());
if (Model)
Model->setScale(scale);
}
break;
case 1102:
env->addFileOpenDialog(L"Please select a model file to open");
break;
case 1103:
showAboutText();
break;
case 1104:
createToolBox();
break;
}
break;
}
}
return false;
}
};
어려운 일은 끝났다. 이제 IRRLICHT 엔진 장치를 만들고, 버튼, 메뉴, 툴바를 붙이자. createDevice()를 이용해 일반적으로 엔진을 시작하면 된다. 그런 후 어플리케이션이 이벤트를 붙잡게 하기 위해, 이벤트리시버 인자를 정해준다. (역자 주 : 이 다음으로 #ifdef WIN32 전처리문을 이용한다는 구문이 나오는데, 과거 예제에 있었던 부분 같다. 현재 예제들은 사용자가 직접 플랫폼과 그래픽 디바이스를 선택하게 한다.)
보다시피 IrrlichtDevice::setResizeAble()이라는 특별한 함수가 호출된다. 이 함수는 메시 뷰어에 아주 유용한 능력을 주는데, 바로 윈도 크기를 자유롭게 바꿀 수 있게 한다.
int main()
{
// ask user for driver
video::E_DRIVER_TYPE driverType = video::EDT_DIRECTX8;
printf("Please select the driver you want for the mesh viewer:\n"\
" (a) Direct3D 9.0c\n (b) Direct3D 8.1\n (c) OpenGL 1.2\n"\
" (d) Software Renderer\n (e) NullDevice\n (otherKey) exit\n\n");
char key;
std::cin >> key;
switch(key)
{
case 'a': driverType = video::EDT_DIRECTX9; break;
case 'b': driverType = video::EDT_DIRECTX8; break;
case 'c': driverType = video::EDT_OPENGL; break;
case 'd': driverType = video::EDT_SOFTWARE; break;
case 'e': driverType = video::EDT_NULL; break;
default: return 1;
}
// create device and exit if creation failed
MyEventReceiver receiver;
Device = createDevice(driverType, core::dimension2d<s32>(640, 480),
16, false, false, false, &receiver);
if (Device == 0)
return 1; // could not create selected driver.
Device->setResizeAble(true);
Device->setWindowCaption(L"Irrlicht Engine - Loading...");
video::IVideoDriver* driver = Device->getVideoDriver();
IGUIEnvironment* env = Device->getGUIEnvironment();
scene::ISceneManager* smgr = Device->getSceneManager();
driver->setTextureCreationFlag(video::ETCF_ALWAYS_32_BIT, true);
다음으로 설정 파일(config file) 을 읽자. 이는 다음과 같은 형식으로 xml에 저장되어 있다.
<?xml version="1.0"?>
<config>
<startUpModel file="some filename"/>
<messageText caption="Irrlicht Engine Mesh Viewer">
Hello!
</messageText>
</config>
이 예제에 사용하는 StartUpModelFile과 메시지 글, 캡션은 xml 파일에 위의 형식으로 저장되어 있다. 그것을 IRRLICHT 엔진의 XML 파셔를 이용해 푼다.
//config 파일을 읽는다.
io::IXMLReader* xml = Device->getFileSystem()->createXMLReader(
"../../media/config.xml");
while(xml && xml->read())
{
switch(xml->getNodeType())
{
case io::EXN_TEXT:
//xml 파일에서 텍스트인 경우는 메시지 글인 경우다.
MessageText = xml->getNodeData();
break;
case io::EXN_ELEMENT:
{
if (core::stringw("startUpModel") == xml->getNodeName())
StartUpModelFile = xml->getAttributeValue(L"file");
else
if (core::stringw("messageText") == xml->getNodeName())
Caption = xml->getAttributeValue(L"caption");
}
break;
}
}
if (xml)
xml->drop(); //xml을 읽은 후, 다 사용했으면 지워줘야 한다!
별로 어렵지 않았을 것이다.이제 멋진 폰트를 설정하고 메뉴를 만들어 보겠다. 모든 메뉴 아이템은 하위 메뉴를 만들 수 있다. menu->addItem(L"File", -1, true, true)를 호출하는 것은 File이란 이름의 ID -1인 새 메뉴를 더한다는 의미다. 다음 인자 true는 사용 가능/불가능을, 다음 true는 하위 메뉴 가능/불가능을 결정한다. 각 하위 메뉴는 menu->getSubMenu(0)의 형식으로 접근 할 수 있는데, 이때 최상위인 'File'은 메뉴 시작점(Entry) 역할을 한다.
// set a nicer font
IGUISkin* skin = env->getSkin();
IGUIFont* font = env->getFont("../../media/fonthaettenschweiler.bmp");
if (font)
skin->setFont(font);
// create menu
gui::IGUIContextMenu* menu = env->addMenu();
menu->addItem(L"File", -1, true, true);
menu->addItem(L"View", -1, true, true);
menu->addItem(L"Help", -1, true, true);
gui::IGUIContextMenu* submenu;
submenu = menu->getSubMenu(0);
submenu->addItem(L"Open Model File...", 100);
submenu->addSeparator();
submenu->addItem(L"Quit", 200);
submenu = menu->getSubMenu(1);
submenu->addItem(L"toggle sky box visibility", 300);
submenu->addItem(L"toggle model debug information", 400);
submenu->addItem(L"model material", -1, true, true );
submenu = submenu->getSubMenu(2);
submenu->addItem(L"Solid", 610);
submenu->addItem(L"Transparent", 620);
submenu->addItem(L"Reflection", 630);
submenu = menu->getSubMenu(2);
submenu->addItem(L"About", 500);
메뉴바 아래의 툴바에는 색깔있는 버튼과 의미는 없지만 예제를 위해 콤보 박스를 붙여본다.
// create toolbar
gui::IGUIToolBar* bar = env->addToolBar();
bar->addButton(1102, 0, driver->getTexture("../../media/open.bmp"));
bar->addButton(1103, 0, driver->getTexture("../../media/help.bmp"));
bar->addButton(1104, 0, driver->getTexture("../../media/tools.bmp"));
// create a combobox with some senseless texts
gui::IGUIComboBox* box =
env->addComboBox(core::rect<s32>(100,5,200,25), bar);
box->addItem(L"Bilinear");
box->addItem(L"Trilinear");
box->addItem(L"Anisotropic");
box->addItem(L"Isotropic");
box->addItem(L"Psychedelic");
box->addItem(L"No filtering");
작접 툴들을 그럴 듯하게 하기 위해 GUI 요소들이 투명화 되는 것을 막고, IRRLICHT 엔진 로그를 새기겠다. (역자 주 : 이전 예제는 그러했으나 현재 예제는 스크롤 바를 이용해 투명화가 가능하게 했다.) 그리고 현재 초당 프레임을 보여주는 글을 만들고, 윈도 캡션을 바꾼다.
// disable alpha
for (s32 i=0; i<gui::EGDC_COUNT ; ++i)
{
video::SColor col =
env->getSkin()->getColor((gui::EGUI_DEFAULT_COLOR)i);
col.setAlpha(255);
env->getSkin()->setColor((gui::EGUI_DEFAULT_COLOR)i, col);
}
// add a tabcontrol
createToolBox();
// create fps text
IGUIStaticText* fpstext =
env->addStaticText(L"", core::rect<s32>(210,26,270,41), true);
// set window caption
Caption += " - [";
Caption += driver->getName();
Caption += "]";
Device->setWindowCaption(Caption.c_str());
거의 다 끝나간다. 시작할 때 도움말 베시지 박스를 뜨게 하고, 첫 모델을 읽자. 좀 더 그럴 듯하게 하기 위해, 배경에 하늘(skybox)을 만들고 사용자가 다룰 수 있는 카메라를 넣자. (어플리케이션 사용자의 편의가 늘 것이다.) 그리고 끝으로 지금까지 준비한 것을 그린다.
// show about message box and load default model
showAboutText();
loadModel(StartUpModelFile.c_str());
// add skybox
SkyBox = smgr->addSkyBoxSceneNode(
driver->getTexture("../../media/irrlicht2_up.jpg"),
driver->getTexture("../../media/irrlicht2_dn.jpg"),
driver->getTexture("../../media/irrlicht2_lf.jpg"),
driver->getTexture("../../media/irrlicht2_rt.jpg"),
driver->getTexture("../../media/irrlicht2_ft.jpg"),
driver->getTexture("../../media/irrlicht2_bk.jpg"));
// add a camera scene node
smgr->addCameraSceneNodeMaya();
// load the irrlicht engine logo
video::ITexture* irrLogo =
driver->getTexture("../../media/irrlichtlogoaligned.jpg");
// draw everything
while(Device->run() && driver)
if (Device->isWindowActive())
{
driver->beginScene(true, true, video::SColor(150,50,50,50));
smgr->drawAll();
env->drawAll();
// draw irrlicht engine logo
driver->draw2DImage(irrLogo,
core::position2d<s32>(10, driver->getScreenSize().Height - 50),
core::rect<s32>(0,0,108-20,460-429));
driver->endScene();
core::stringw str = L"FPS: ";
str += driver->getFPS();
fpstext->setText(str.c_str());
}
Device->drop();
return 0;
}
--------------------------------------------------------------------------
이번 예제는 이전 IRRLICHT 버전의 설명이 섞여 있는 듯한 인상을 받았다. 하지만 그런 것은 그렇게 중요한게 아니다. 메시 뷰어는 모든 3D 게임의 시작이라 할 수 있다. 이 툴을 통해 전용 포맷을 만들고, 이후 좀 더 심도 있는 게임 세계를 창조할 수 있다.
그렇기에 사실 이번 예제는 IRRLICHT의 예제라기 보다는, 3D 프로그래밍 개발에 있어서 좋은 본보기를 제시한다. 기본 기술을 익힌 프로그래머가 실제 게임을 만들기 위해 준비하는 툴 개발 기술은 참으로 중요한 것이다. (다른 엔진의 경우는 그것을 직접 제공하는 경우가 많다. IRRLICHT의 경우는 예제를 통해 그런 것을 대신하는 듯하다. IRRLICHT 관련 포럼을 참조.)
그리고 앞으로 나올 쉐이더, 픽셀라이트닝, 터레인 관련 예제들을 보면, 이번 예제의 위치가 어떤 것인지 알 수 있다.
이번 예제에서 애매한 것이, /**/ 설명글 이외에 각 문단별 // 주석이 많다는 것이다. 쉬운 영어이기에 대부분 그냥 넘어갔다.